The Canon AE-1 Program is an iconic 35mm SLR camera known for its versatility and ease of use․ Introduced in 1981, it offers Program, Shutter-Priority, and Manual modes, making it a favorite among photography enthusiasts and professionals alike․
1․1 Historical Background and Development
Released in 1981, the Canon AE-1 Program was a groundbreaking 35mm SLR designed to bridge the gap between amateur and professional photography․ It built on the success of the original AE-1, incorporating advanced features like multiple exposure modes and improved metering, making it a versatile tool for photographers of all levels․
1․2 Key Features and Innovations
The Canon AE-1 Program introduced three operation modes: Program, Shutter-Priority, and Manual, offering unparalleled control․ It featured a built-in light meter with center-weighted metering, manual override capabilities, and an electronic shutter with speeds from 2 to 1/1000th of a second, plus bulb mode․ Its compatibility with Canon FD lenses and ergonomic design made it highly versatile and user-friendly․
1․3 Popularity Among Photographers
The Canon AE-1 Program gained immense popularity for its reliability, ease of use, and versatility․ It became a favorite among both professionals and enthusiasts, offering advanced features in a user-friendly design․ Its durability and compatibility with Canon FD lenses made it a go-to choice, ensuring its enduring appeal in the world of photography․
Getting Started with the Canon AE-1 Program
Unbox and familiarize yourself with the camera, ensuring all components are included․ Insert the battery, set the film speed, and handle the camera with care for optimal performance․
2․1 Unboxing and Initial Setup
When unboxing, ensure all components are included․ Insert the battery, set the film speed, and familiarize yourself with the controls․ Mount the lens carefully, ensuring it clicks into place securely․ Handle the camera with care to avoid damage and ensure optimal functionality․
2․2 Identifying Camera Parts and Controls
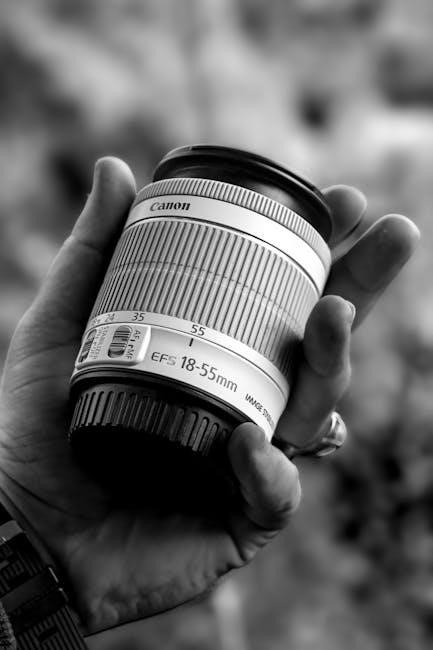
The Canon AE-1 Program features a clear layout with essential controls․ The viewfinder displays exposure information, while the mode dial selects shooting modes․ The aperture ring, shutter speed dial, and ASA/ISO dial are key for manual adjustments․ The shutter button and film advance lever are intuitive for operation․
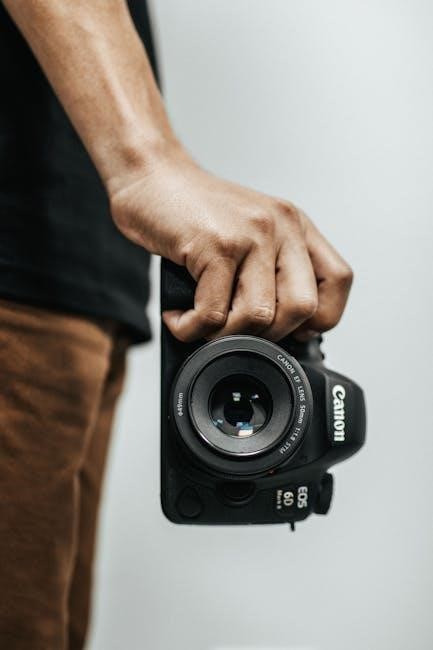
2․3 Basic Camera Handling and Ergonomics
The Canon AE-1 Program is designed for comfortable handling, with a contoured grip and intuitive control placement․ The camera balances well in the hand, reducing fatigue during extended use․ Proper finger placement on the shutter button and film advance lever ensures smooth operation and minimizes camera shake․
Understanding the Operation Modes
The Canon AE-1 Program offers three primary operation modes: Program, Shutter-Priority, and Manual․ These modes provide flexibility for photographers, catering to both automatic and manual control preferences, ensuring versatility in various shooting scenarios․
3․1 Program Mode (Fully Automatic)
The Program Mode allows the camera to automatically set both shutter speed and aperture for optimal exposure, making it ideal for beginners and casual photographers who want professional results without manual adjustments․ This mode is perfect for capturing sharp images in diverse lighting conditions, offering convenience and consistency, ensuring excellent results․
3․2 Shutter-Priority Mode (TV Mode)
In Shutter-Priority Mode, photographers control the shutter speed manually, while the camera automatically adjusts the aperture for proper exposure․ This mode is ideal for capturing motion effects, such as freezing fast-moving subjects or creating blurred backgrounds, offering creative control while ensuring balanced exposure in various lighting conditions․
3․3 Manual Mode (Full Control)
Manual Mode offers full control over both aperture and shutter speed, allowing photographers to customize settings for precise results․ Ideal for experienced users, this mode enables creative freedom by letting you manually adjust exposure parameters to achieve desired effects in various lighting conditions and artistic scenarios․
Exposure Control and Metering
The Canon AE-1 Program features precise exposure control and metering, ensuring accurate results․ Its built-in light meter and electronic system allow for seamless adjustments, catering to various lighting conditions and creative needs․
4․1 Aperture and Shutter Speed Settings
The Canon AE-1 Program allows precise control over aperture and shutter speed․ In Program mode, both are set automatically, while Shutter-Priority mode lets you adjust shutter speed, with aperture adjusting automatically․ Manual mode offers full control over both settings, enabling creative flexibility for photographers to achieve desired effects in various lighting conditions․
4․2 ISO and Film Speed Adjustment
The Canon AE-1 Program allows ISO settings from 12 to 3200, enabling flexibility for various lighting conditions․ Film speed is adjusted using the ISO dial on the top plate, ensuring proper exposure settings․ Correct ISO adjustment is essential for achieving optimal results with different film stocks and lighting scenarios․
4․3 Built-in Light Meter and Metering Modes
The Canon AE-1 Program features a built-in light meter for precise exposure control․ It supports center-weighted metering, ensuring accurate readings for various lighting conditions․ The meter operates in all modes, providing essential guidance for manual adjustments and automatic settings, while supporting ISO ranges from 12 to 3200 for enhanced flexibility․
Working with Lenses and Accessories
Explore the range of Canon FD lenses and compatible accessories designed to enhance the functionality and performance of your AE-1 Program, ensuring versatility in various shooting scenarios․
5․1 Overview of Canon FD Lenses
Canon FD lenses are renowned for their exceptional optical quality and versatility, offering a wide range of focal lengths and apertures to suit various photography needs․ Designed specifically for the AE-1 Program, these lenses ensure precise control and outstanding image clarity, making them ideal for portrait, landscape, and macro photography alike․
5․2 Lens Compatibility and Mounting
The Canon AE-1 Program is compatible with Canon FD lenses, which are specifically designed for the FD mount system․ These lenses ensure proper alignment and communication between the lens and camera, enabling accurate aperture control and optimal performance․ Using FD lenses is essential for achieving the best results with the AE-1 Program․
5․3 Recommended Accessories for Enhanced Functionality
To enhance your Canon AE-1 Program experience, consider adding motor drives for faster film winding, dedicated flash units like the Speedlite 168A for improved lighting control, and optional viewfinders for better visibility․ These accessories optimize performance and adaptability, ensuring you get the most out of your camera in various shooting scenarios․
Using Flash Photography
Flash photography enhances low-light shooting with the Canon AE-1 Program․ Use dedicated Speedlite units like the 168A for optimal results, ensuring proper synchronization and balanced illumination in your images․
6․1 Dedicated Flash Units (e․g․, Speedlite 168A)
The Speedlite 168A is a dedicated flash unit designed for seamless integration with the Canon AE-1 Program․ It offers TTL (Through-The-Lens) metering for precise flash exposure, ensuring balanced illumination․ The unit is easy to mount and syncs perfectly with the camera, providing professional-grade results in low-light conditions while minimizing harsh shadows․
6․2 Sync Modes and Flash Synchronization
The Canon AE-1 Program supports X-sync and M-sync modes for flash synchronization, ensuring precise timing between flash and shutter․ X-sync is ideal for most flash photography, while M-sync is used with older flash units․ Proper synchronization ensures sharp, well-lit images without ghosting, optimizing flash performance in various lighting conditions․
6․3 Best Practices for Effective Flash Use
For effective flash photography with the Canon AE-1 Program, use the dedicated Speedlite 168A for optimal results․ Adjust flash angles and use diffusion to soften light․ Test settings before shooting to avoid overexposure․ Ensure proper synchronization and experiment with flash-to-subject distances for balanced, natural-looking illumination in various lighting scenarios․
Advanced Shooting Techniques
Explore multiple exposures, long exposures, and self-timer use for creative control․ Master manual mode for precise adjustments, enabling unique artistic expressions and enhanced photography experiences․
7․1 Multiple Exposures and Long Exposures
Multiple exposures can be achieved by disabling the film advance, allowing creative layering․ Long exposures are accessed via Bulb mode, ideal for capturing light trails or starry skies․ Use a tripod for stability to avoid camera shake during extended exposures․
7․2 Using the Self-Timer and Remote Shutter Release
The self-timer delays shutter release by 10 seconds, minimizing camera shake․ A remote shutter release, like the SR-10, enables hands-free shooting, reducing vibrations․ Both are ideal for sharp images in low-light conditions or group portraits, ensuring precise control over timing and composition․
7․3 Creative Techniques with Manual Mode
Manual Mode offers full control over aperture and shutter speed, enabling creative techniques like intentional overexposure or underexposure․ Use it to experiment with depth of field, motion blur, or unique lighting effects․ The overexposure warning helps prevent errors, while manual settings allow for artistic expression and precision in various shooting scenarios․

Camera Maintenance and Care
Regular cleaning of the camera and lenses ensures optimal performance․ Use a soft cloth for surfaces and avoid harsh chemicals․ Store in a cool, dry place to prevent damage․
8․1 Cleaning the Camera and Lenses
Regular cleaning ensures optimal performance․ Use a soft, dry cloth for the camera body and lenses․ For stubborn spots, dampen the cloth slightly but avoid harsh chemicals․ Lens cleaning tissues or solutions can be used carefully, ensuring no streaks remain․ Avoid touching lens elements to prevent smudges and scratches․ Clean after each use for best results․
8․2 Proper Storage and Handling
Store the Canon AE-1 Program in a cool, dry place away from direct sunlight and moisture․ Use a protective case to prevent scratches and damage․ Handle the camera and lenses with care, avoiding drops or excessive force․ Always remove the lens cap when storing to prevent condensation buildup․
8․3 Regular Maintenance for Longevity
Regular cleaning of the camera and lenses with soft cloths or brushes prevents dust buildup․ Lubricate moving parts as needed and check for wear․ Store batteries properly to avoid leakage․ Inspect the viewfinder and mirror for dust․ Professional servicing every few years ensures optimal performance and extends the camera’s lifespan․
Troubleshooting Common Issues
Address battery drain by replacing or checking connections․ Inspect the shutter for sticking or misalignment․ Consult the manual or seek professional servicing for persistent errors or mechanical issues․
9․1 Battery and Power Problems
Battery issues can cause inconsistent operation․ Check connections and ensure proper installation․ Replace batteries if meter readings are erratic or shutter fails to operate․ Clean contacts for better conductivity․ If problems persist, consult the manual or contact a professional for servicing․
9․2 Shutter and Mirror Mechanism Issues
Issues like stuck shutters or erratic mirror operation can disrupt shooting․ Symptoms include slow shutter speeds, unusual noises, or incomplete mirror return․ Clean the mechanism gently and ensure proper battery function․ If problems persist, professional servicing may be required to restore smooth operation and prevent further damage․
9․3 Common Errors and Solutions
Common errors include improper lens mounting, light meter malfunctions, and film loading issues․ Ensure lenses are securely attached, clean the light meter regularly, and verify film alignment․ For flash synchronization problems, use dedicated units like the Speedlite 168A․ Always refer to the manual for specific troubleshooting steps to resolve issues effectively․
Accessories for Enhanced Functionality
Optional viewfinders, motor drives, and winders enhance shooting efficiency․ Filters and lens attachments expand creative possibilities, while dedicated flash units like the Speedlite 168A improve lighting control․
10․1 Optional Viewfinders and Screens
Optional viewfinders and screens enhance functionality․ Interchangeable screens offer flexibility for specific shooting needs, while auxiliary viewfinders improve visibility in bright conditions․ These accessories are designed to optimize the shooting experience with the AE-1 Program, ensuring compatibility and ease of use for photographers seeking enhanced control and customization․
10․2 Motor Drives and Winders
Motor drives and winders enhance shooting efficiency by enabling rapid film advancement․ Compatible with the AE-1 Program, these accessories streamline workflows, especially in fast-paced photography scenarios․ They offer improved handling and convenience, making them ideal for photographers seeking to optimize their workflow and productivity with the camera․
10․3 Filters and Lens Attachments
Filters and lens attachments expand the creative possibilities of the Canon AE-1 Program․ Filters like UV, polarizing, and color graduated options enhance image quality and control light․ Lens attachments, such as teleconverters or wide-angle adapters, extend focal range․ Always ensure compatibility with FD mounts and follow manual guidelines for proper use․

Optimizing Camera Performance
Optimizing the Canon AE-1 Program involves regular maintenance, proper storage, and using compatible FD lenses and flashes․ Customizing settings enhances performance in various scenarios effectively․
11․1 Customizing Camera Settings
Customizing the Canon AE-1 Program involves adjusting aperture, shutter speed, and ISO settings to suit your photography style․ Utilize the Program, Shutter-Priority, or Manual modes for precise control․ Experimenting with these settings ensures optimal results in various lighting conditions and enhances creative expression in your work․
11․2 Mastering Various Shooting Scenarios
Mastering different shooting scenarios with the Canon AE-1 Program involves understanding its modes․ Use Shutter-Priority for action shots, Aperture-Priority for depth of field control, and Manual mode for creative freedom․ Adjust ISO settings for optimal results in varying lighting conditions, ensuring versatility in capturing portraits, landscapes, and low-light scenes effectively․
11․3 Tips for Achieving Professional Results
To achieve professional results with the Canon AE-1 Program, experiment with lighting, composition, and film choices․ Use the self-timer for sharp images, leverage the built-in meter for accurate exposures, and explore manual mode for creative control․ Regularly clean the lens and camera to maintain image clarity and longevity․
The Canon AE-1 Program remains a timeless classic, offering unmatched versatility and ease of use․ Its enduring popularity among photographers underscores its legacy as a legendary imaging tool․
12․1 Summary of Key Features
The Canon AE-1 Program features electronic control, three operating modes (Program, Shutter-Priority, Manual), and compatibility with Canon FD lenses․ It includes a built-in light meter, manual override, and dedicated flash support, making it a versatile and durable choice for photographers of all skill levels․
12․2 Final Tips for Getting the Most Out of Your AE-1 Program
Explore all modes, from Program to Manual, to master various shooting scenarios․ Use high-quality FD lenses for optimal results․ Regularly clean and maintain your camera for longevity․ Experiment with flash photography and creative techniques․ Store your camera properly to ensure its durability and performance for years to come;