Kenmore Mini Ultra Sewing Machine Manual: A Comprehensive Guide
This guide offers detailed instructions for the Kenmore Mini Ultra, covering operation, maintenance, and troubleshooting – available in printed and digital formats.
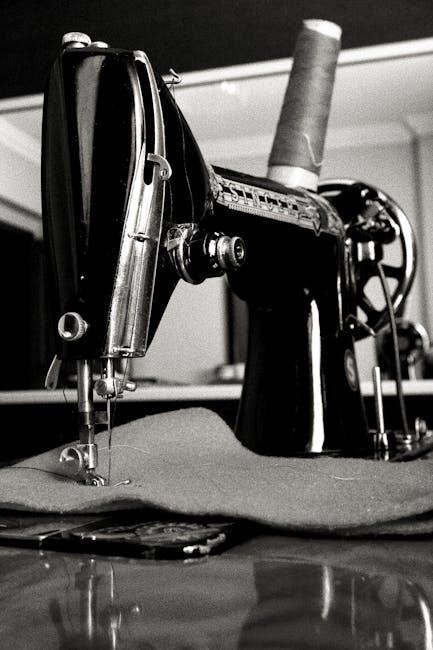
The Kenmore Mini Ultra sewing machine is a compact and lightweight option, ideal for beginners and small projects. Often sought after, finding a dedicated manual can be challenging, but resources exist! This machine, model 385.11206300, provides basic stitch functions for everyday repairs and crafting.
While Kenmore is renowned for reliable appliances, the Mini Ultra’s simplicity means a comprehensive understanding of its features is key. Printed manuals are available through online marketplaces like Etsy, offering English, Spanish, and French translations. Online resources, such as kenmoresewingmanuals.com, also provide downloadable options.
Understanding the Model Number: 385.11206300
The model number 385.11206300 specifically identifies the Kenmore Mini Ultra sewing machine. This designation is crucial when searching for compatible parts, accessories, or, most importantly, the correct instruction manual. Kenmore utilizes unique model numbers to differentiate between its various appliance iterations.
Locating resources using this number ensures you receive information tailored to your machine’s specifications. Online searches and parts retailers rely heavily on this identifier. Knowing the model number streamlines the process of finding assistance with troubleshooting or repairs, and confirms manual compatibility.
Where to Find the Manual (Printed & Digital)
Finding a Kenmore Mini Ultra manual can be done through several avenues. Printed copies are available for purchase from online marketplaces like Etsy, offering original or reproduction versions. Digitally, Kenmore sewing machine instruction and service manuals are accessible for instant download from websites specializing in appliance documentation.
Alternatively, Kenmore’s official website, or Sears (due to the Kenmore-Sears partnership), may host downloadable manuals. Searching using the model number (385.11206300) is vital for accurate results, ensuring the manual matches your specific machine.
Key Features and Specifications
The Kenmore Mini Ultra boasts a compact, lightweight design with basic stitch functions, adjustable settings, and a reverse stitch for versatile sewing projects.
Compact and Lightweight Design
The Kenmore Mini Ultra truly shines with its portability. Designed for users needing a space-saving solution, this machine is remarkably compact and easy to maneuver. Its lightweight construction makes it ideal for taking to classes, workshops, or simply storing away when not in use. Despite its small size, it doesn’t compromise on functionality, offering essential sewing capabilities in a convenient package. This feature is particularly beneficial for beginners or those with limited space, allowing for comfortable and accessible sewing experiences anywhere. It’s a testament to efficient design!
Basic Stitch Functions
The Kenmore Mini Ultra excels in providing essential sewing functions for everyday projects. It typically includes straight stitch, zigzag stitch, and often a reverse stitch for secure seam finishing. These core stitches enable users to tackle a wide range of repairs and simple creations, from clothing alterations to crafting projects. While not boasting an extensive stitch library, the machine focuses on delivering reliable performance with these fundamental options. This simplicity makes it exceptionally user-friendly, particularly for beginners learning the basics of sewing and machine operation.
Adjustable Stitch Length and Width
The Kenmore Mini Ultra offers customizable stitch parameters, allowing for versatile sewing. Users can adjust stitch length to suit fabric weight and project needs – shorter for delicate materials, longer for heavier ones. Similarly, stitch width adjustments modify the zigzag stitch’s breadth, impacting fabric coverage and decorative effects. These controls, though potentially basic in implementation, provide crucial flexibility. Fine-tuning these settings ensures optimal seam strength, prevents puckering, and achieves desired aesthetic outcomes; Mastering these adjustments unlocks the machine’s full potential for diverse sewing applications.
Reverse Stitch Capability
The Kenmore Mini Ultra incorporates a reverse stitch function, essential for securing seams at the beginning and end of a sewing line. This prevents unraveling and enhances seam durability. Activating reverse stitch typically involves a dedicated lever or button, shifting the machine into reverse mode. It’s crucial to use reverse sparingly – a few stitches are usually sufficient. Overuse can cause puckering or strain the machine. This feature is fundamental for creating professional-quality garments and home décor items, ensuring long-lasting and secure construction. Proper utilization extends project lifespan.

Setting Up Your Sewing Machine
Proper setup involves threading both upper and lower threads, winding and inserting the bobbin, ensuring smooth operation and optimal stitch quality for your machine;
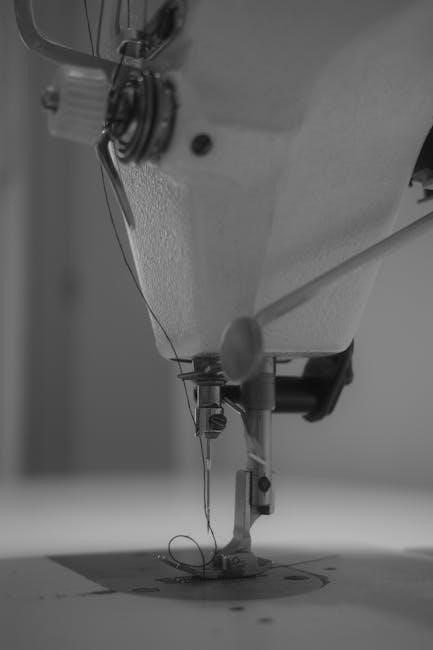
Threading the Machine (Upper Thread)
Begin by raising the presser foot, which releases tension discs for proper thread flow. Guide the thread from the spool pin, through the first thread guide, and then down into the tension disc area. Ensure the thread seats firmly between the tension discs – this is crucial for stitch quality.
Next, continue threading through the take-up lever, then down and around the thread guide near the needle. Finally, thread the needle from front to back. Incorrect threading can cause skipped stitches or tangling, so double-check each step against the manual’s diagrams for the Kenmore Mini Ultra.
Winding the Bobbin
Start by placing the spool of thread onto the spool pin. Then, guide the thread through the designated thread guide for bobbin winding. Next, pass the thread several times around the bobbin, ensuring it’s evenly distributed. Engage the bobbin winding mechanism – typically by pushing the bobbin spindle to the right.
Hold the thread tail firmly as you begin winding. Gently press the foot pedal to start the machine, allowing it to wind the bobbin evenly. Once full, the machine should automatically stop. Cut the thread and remove the full bobbin for insertion.
Inserting the Bobbin
Begin by locating the bobbin case on the underside of the machine. Open the bobbin cover to access the bobbin area. Insert the wound bobbin into the bobbin case, ensuring it rotates freely and smoothly. The thread should unwind in a counter-clockwise direction when viewed from above.
Guide the thread through the tension spring of the bobbin case, and then through the designated slot or path leading to the needle plate. Close the bobbin cover securely. Proper bobbin insertion is crucial for consistent stitch quality and preventing tangling.
Threading the Lower Thread
With the bobbin correctly inserted, hold the thread tail. Gently rotate the handwheel towards you, causing the take-up lever to move upwards. This action will loop the thread around the bobbin case. Continue rotating the handwheel until the thread is fully engaged with the tension mechanism.
Ensure the thread is securely caught by the tension spring. Pull gently on the thread tail to confirm it’s properly threaded. A properly threaded lower thread is essential for forming balanced stitches and preventing issues like looping or thread breakage during sewing.
Operating Instructions
Master stitch selection, speed control, and adjustments for optimal results with your Kenmore Mini Ultra; ensuring smooth and efficient sewing for all projects.
Powering On and Off
The Kenmore Mini Ultra sewing machine features a straightforward power operation. Locate the power switch, typically found on the side or back of the unit. To power on, simply slide the switch to the “On” position; a light indicator will illuminate, confirming power.
Before starting any sewing operation, ensure the machine is securely plugged into a functioning electrical outlet. To power off, reverse the process – slide the switch back to the “Off” position. Always disconnect the machine from the power source when not in use or during maintenance to prevent accidental activation and ensure safety;
Selecting a Stitch
The Kenmore Mini Ultra offers a selection of basic stitch functions for various sewing needs. To choose a stitch, locate the stitch selection dial, usually positioned on the front of the machine. Rotate the dial to align the desired stitch pattern with the indicator mark.
Common stitch options include straight stitch, zigzag stitch, and potentially a few decorative stitches. Refer to the machine’s diagrams within the manual to identify each stitch pattern. Ensure the stitch width and length are appropriately adjusted for the chosen stitch and fabric type before commencing sewing.
Adjusting Stitch Settings
Fine-tuning stitch settings is crucial for optimal results. The Kenmore Mini Ultra features dials to control stitch length and width. For standard fabrics, a medium stitch length (around 2.5mm) is a good starting point. Adjust for denser fabrics by shortening the length, and for lighter fabrics, lengthen it.
Stitch width controls the zigzag’s breadth. Wider settings are suitable for overlocking edges, while narrower settings are ideal for reinforcing seams. Always test settings on scrap fabric before sewing your project to ensure desired appearance and strength.
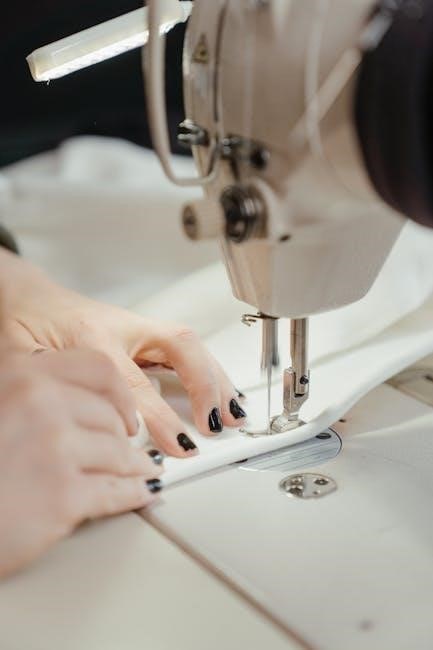
Starting and Stopping the Machine
To begin sewing with your Kenmore Mini Ultra, gently press the foot pedal. The machine will start smoothly, initiating the selected stitch. Maintain consistent foot pedal pressure for even stitching. To stop, simply release the foot pedal; the needle will halt in its current position.
Never force the fabric; let the machine feed it naturally. For precise stopping points, use the reverse stitch function briefly before lifting the presser foot. This secures the seam and prevents unraveling. Always turn off and unplug the machine when not in use.
Maintenance and Troubleshooting
Regular cleaning and oiling ensure optimal performance. Address common issues like thread tangling or needle breakage with our simple troubleshooting guide.
Cleaning the Machine
Maintaining a clean Kenmore Mini Ultra is crucial for smooth operation and longevity. Always unplug the machine before cleaning! Remove the dust cover and use a soft brush to clear lint and debris from the bobbin area, feed dogs, and around the needle plate. A small vacuum cleaner attachment can also be helpful.
Wipe down the exterior with a slightly damp cloth. Avoid using harsh chemicals or abrasive cleaners, as these can damage the finish. Periodically, a drop of sewing machine oil can be applied to key moving parts, but avoid over-oiling. Consistent cleaning prevents thread buildup and ensures accurate stitching.
Oil Points and Lubrication
Proper lubrication extends the life of your Kenmore Mini Ultra. Locate the designated oil points – typically around the bobbin area, shuttle hook, and along the main shaft. Use only sewing machine oil; other oils can gum up the mechanism.
Apply a small drop to each point, and then operate the machine briefly to distribute the oil. Avoid over-oiling, as excess oil attracts dust and lint. Regular lubrication ensures smooth, quiet operation and prevents wear and tear on vital components. Consult the manual’s diagrams for precise oil point locations.
Troubleshooting Common Issues (Thread Tangling)
Thread tangling is a frequent issue with the Kenmore Mini Ultra, often stemming from improper threading. Re-thread both the upper and lower threads, ensuring the presser foot is raised during upper threading. Verify the bobbin is correctly inserted and the thread flows smoothly.
Check tension settings; too-tight or too-loose tension can cause tangles. Use quality thread appropriate for your fabric. Clean the bobbin area regularly to remove lint and debris. If problems persist, consult the manual’s diagrams for correct threading paths.
Troubleshooting Common Issues (Needle Breakage)
Needle breakage on the Kenmore Mini Ultra often indicates incorrect needle selection for the fabric type. Always use a needle size and type appropriate for the material you’re sewing – heavier fabrics require stronger needles. Ensure the needle is correctly inserted, fully pushed up into the clamp, and not bent or damaged.
Avoid forcing the fabric through the machine; let the feed dogs do the work. Check for obstructions like pins or thick seams. Incorrect threading or tension can also contribute to needle breakage, so review those steps.
Advanced Techniques & Tips
Mastering fabric choices, needle selection, foot pressure, and tension settings unlocks the full potential of your Kenmore Mini Ultra sewing machine.
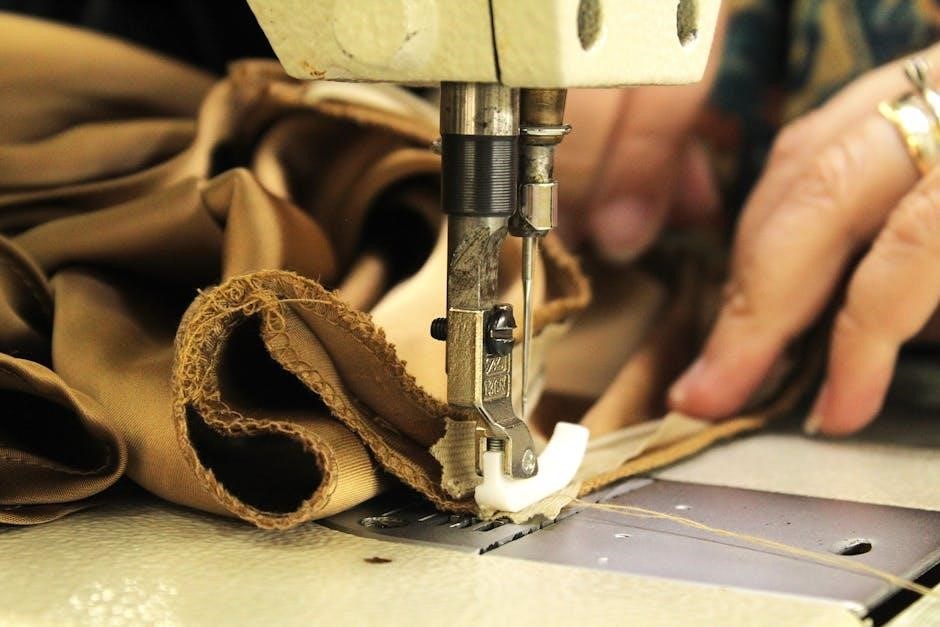
Using Different Types of Fabric
The Kenmore Mini Ultra, while compact, can handle a variety of fabrics with proper adjustments. Lighter fabrics like chiffon require finer needles and lower thread tension to prevent puckering. For heavier materials such as denim, a heavier needle and increased tension are crucial for successful stitching.
Always test stitch on a scrap piece of the chosen fabric before beginning your project. Adjust stitch length based on fabric weight; shorter stitches for delicate fabrics and longer stitches for heavier ones. Consider using a walking foot for slippery or multiple layers to ensure even feeding.
Needle Selection Guide
Choosing the correct needle is vital for optimal performance with the Kenmore Mini Ultra. Universal needles (size 80/12 or 90/14) work well for woven fabrics. Ballpoint needles (size 75/11 or 80/12) are best for knits, preventing skipped stitches. Denim needles (size 90/14 or 100/16) are designed for heavier fabrics like denim and canvas.
A sharp needle is essential; replace it frequently, especially after sewing thick or abrasive materials. Always ensure the needle is correctly inserted, with the flat side facing the back of the machine. Using the wrong needle can cause thread breakage, skipped stitches, and damage to your fabric.
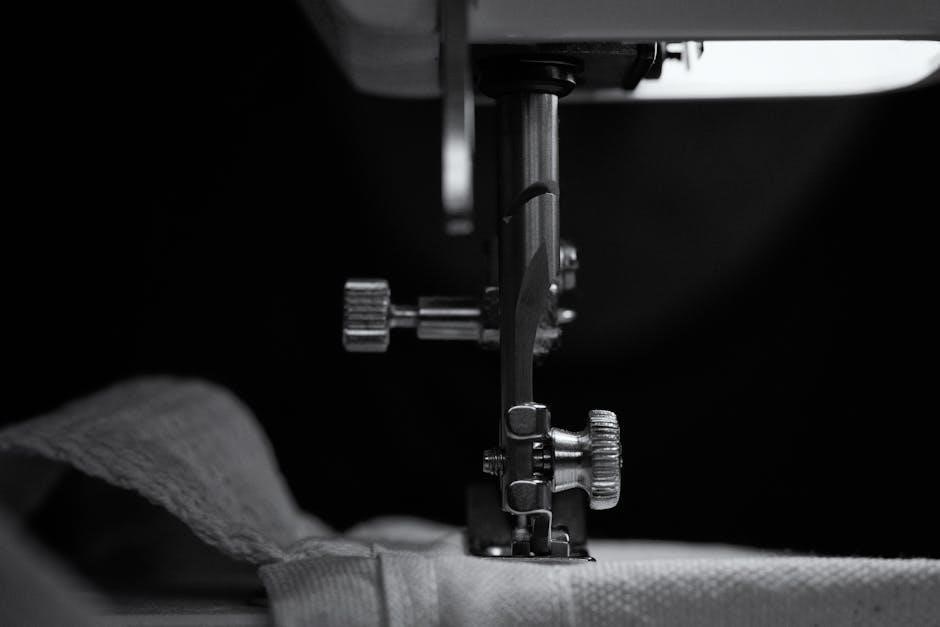
Foot Pressure Adjustment
Adjusting foot pressure is crucial for achieving even stitches across various fabric weights. The Kenmore Mini Ultra likely features a dial or screw to control this. Lower pressure is ideal for delicate fabrics like silk, preventing puckering or damage. Increase pressure for thicker materials like denim or multiple layers, ensuring proper fabric feed.
Experiment with different settings on scrap fabric to find the optimal pressure for your project. Incorrect pressure can lead to skipped stitches, uneven seams, or fabric distortion. Consistent testing guarantees professional-looking results.
Understanding Tension Settings
Proper tension is vital for balanced stitches; imbalances cause looping or puckering. The Kenmore Mini Ultra’s tension dial controls the upper thread pull. Higher numbers increase tension, while lower numbers decrease it. Begin with the default setting (usually ‘4’ or ‘5’) and test on scrap fabric.
If the bobbin thread pulls to the top, lower the upper tension. Conversely, if the upper thread loops, increase it. Adjust in small increments, retesting after each change. Achieving balanced tension ensures strong, neat seams and prevents thread breakage.
Safety Precautions
Always disconnect the machine before maintenance. Avoid injury by keeping fingers clear of the needle. Use caution with electrical components.
General Safety Guidelines
Before operating your Kenmore Mini Ultra, carefully read this entire manual to understand its functions and safety features. Always disconnect the power supply when threading, changing the needle, or performing any maintenance. Keep the machine away from water and damp environments to prevent electrical shock. Never operate the machine with damaged cords or plugs.
Ensure the area around the machine is well-lit and free of obstructions. Do not force the fabric; let the machine feed it smoothly. Keep fingers away from moving parts, like the needle and presser foot, to avoid injury. Supervise children when the machine is in use, and store it securely when not in operation.
Electrical Safety
To ensure safe operation, always use a properly grounded electrical outlet with the correct voltage as specified on the machine’s label. Never operate the Kenmore Mini Ultra with a damaged power cord or plug; replace them immediately. Avoid using extension cords if possible, and if necessary, use a heavy-duty cord rated for the machine’s power consumption.
Do not immerse the machine, cord, or plug in water or any other liquid. Disconnect the machine from the power source before cleaning or performing maintenance. If the machine malfunctions or emits unusual smells or sounds, immediately disconnect it and seek professional repair.
Avoiding Injury
Always keep fingers away from moving parts, such as the needle, presser foot, and handwheel, while the machine is operating. Use the provided needle guard when not in use. Never attempt to sew over broken needles; this can cause injury and damage the machine. Disconnect the power before changing needles or performing any maintenance.
Be cautious when handling sharp objects like scissors and seam rippers. Do not force the fabric under the needle; let the machine feed the fabric naturally. Keep the work area well-lit and free of clutter to prevent accidents.
Parts and Accessories
Essential components include standard presser feet, and optional accessories are available for purchase; replacement parts ensure longevity and continued functionality of your machine.
Standard Presser Feet
The Kenmore Mini Ultra typically includes a selection of standard presser feet designed for versatile sewing applications. A general-purpose or zig-zag foot is commonly included, ideal for everyday stitching and decorative work. Another standard foot is often a buttonhole foot, facilitating consistent and professional-looking buttonholes. Furthermore, a zipper foot is usually provided, enabling close-stitch sewing along zipper tapes with precision. These feet easily attach to the presser shank, allowing quick changes based on project needs. Understanding each foot’s function expands the machine’s capabilities, ensuring optimal results across various fabrics and techniques.
Optional Accessories
Enhance your Kenmore Mini Ultra’s functionality with a range of optional accessories. Consider a gathering foot for creating ruffles and gathers efficiently. A blind hem foot allows for nearly invisible hems on skirts and trousers. Quilting enthusiasts might benefit from a walking foot, ensuring even fabric feed during quilting projects. Additional presser feet, like those for satin stitch or embroidery, expand creative possibilities. Bobbins, needles in various sizes, and lint brushes are also useful additions. Exploring these accessories unlocks the machine’s full potential, catering to specialized sewing tasks and personal preferences.
Replacement Parts Information
Securing replacement parts for your Kenmore Mini Ultra is crucial for longevity. Commonly needed items include needles, bobbins, presser feet, and belts. Due to the machine’s age, sourcing parts might require some effort. Online retailers specializing in vintage sewing machine parts are a good starting point. The model number, 385.11206300, is essential when ordering. Checking sewing machine forums and communities can also yield valuable leads and part numbers. Always verify compatibility before purchasing, and consider professional servicing for complex repairs if parts are unavailable or installation proves difficult.
Kenmore Brand Overview
Kenmore, an American brand owned by Transformco, boasts a long history of reliable household appliances, including sewing machines, through its partnership with Sears.
History of Kenmore Appliances
Kenmore’s journey began in 1913 as a house brand for Sears, Roebuck & Co., initially offering sewing machines. This innovative approach allowed Sears to provide quality appliances directly to consumers, bypassing traditional retailers. Over the decades, Kenmore expanded its product line to encompass a wide range of home appliances, becoming synonymous with durability and value.
The brand consistently adapted to evolving consumer needs, integrating cutting-edge technology while maintaining its reputation for reliability. Kenmore’s enduring success is rooted in its commitment to delivering dependable products and exceptional customer service, solidifying its place as a trusted household name for over a century.
Kenmore’s Reputation for Reliability
Kenmore has cultivated a longstanding reputation for producing dependable and long-lasting appliances. This commitment to quality stems from rigorous testing and a focus on durable components, ensuring consistent performance over time. Consumers consistently praise Kenmore for its appliances’ ability to withstand regular use, minimizing repairs and replacements.
The brand’s dedication extends beyond product construction, encompassing responsive customer support and readily available replacement parts. This holistic approach reinforces Kenmore’s position as a trusted provider of reliable home solutions, fostering brand loyalty across generations.
Kenmore and Sears Partnership
For decades, Kenmore appliances were exclusively sold through Sears, creating a powerful retail synergy. This partnership allowed Kenmore to reach a vast customer base while benefiting from Sears’ established distribution network and customer service infrastructure. The collaboration fostered brand recognition and solidified Kenmore’s presence in American households.
Though the relationship has evolved with Sears’ restructuring, the legacy of this partnership remains significant. It shaped Kenmore’s brand identity and contributed to its enduring reputation for quality and accessibility, even as distribution channels diversify today.